Brief:
This note is about the Primavera XER files format with focus on the data format itself and how you can view (and edit) XER-files in Excel.
Introduction
This note describes in general terms how the Primavera P6 XER file format is structured and is not dependent of what version of Primavera you are using. A brief description of how you can use Excel as a viewer for the XER file is also included. NOTE don’t change anything in the file unless you are absolutely sure of what you are doing.
In 1999 Primavera Inc acquired Eagle Ray Software Systems that was competing with Artemis and Open Plan (Welcom) for supplying the enterprise market with a feature rich upper tier planning system. The product was rebranded as Primavera P3/e and in 2007, when the first “real” portfolio capabilities were released in version 6 of the product, it was renamed Primavera P6. In that release the XER format was defined as the preferred import/export file format and the file extension XER simply stands for “eXport Eagle Ray”.
It is important to understand that the primary aim of the XER format is to enable you to import data from another P6 system, and to recreate projects exactly as they are defined in the source system.
General format description
Primavera (P6) expects the format to be a “flat ASCII” file with visible characters and only allow the formatting characters “Carriage Return” (CR as defined by your operation system) and “Tabulator”. When you open a XER file in a text editor you should see something like this:
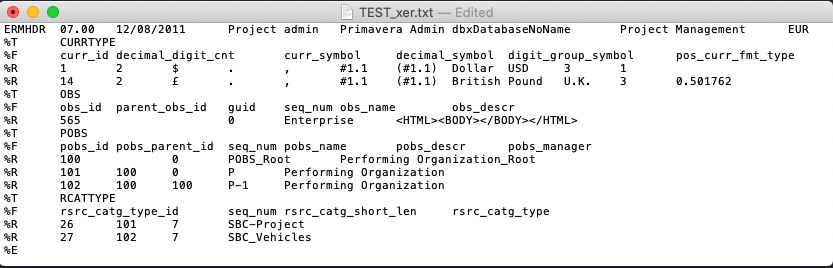
The data is organized in lines each having a specific meaning, and each line separate the data fields with a Tab character and ends with a CR character. The first line starts with a magic word “ERMHDR” and signifies general system information P6 needs, e.g. the 2nd word “07.00” is the P6 version number from which the file was created. This header line always needs to be the first line in a correct formatted XER file.
The following lines will always start with a “%” and a single character that defines the line:
%T Table
%F Fields
%R data Row
%E End of data
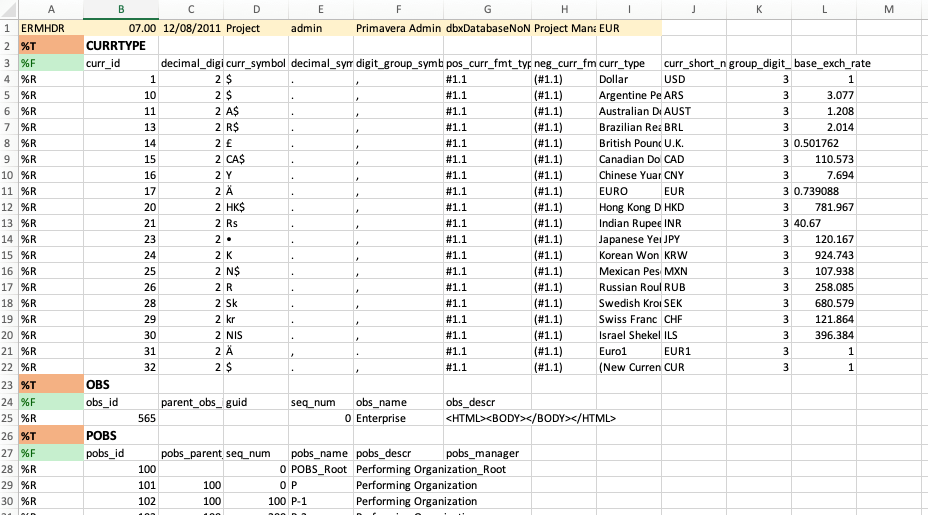
Using Excel as a XER file viewer
To view the XER file in Excel you should take a copy of it and append the file extension “.txt”. If you right-click file and choose “Open with…” and selects Excel the file will just be imported with the standard template setup.
On the other hand if you start Excel first and then select “Open” and choose the file extension format for Text File that included “.txt” the import Wizard will guide you through the process, but you must ensure that file type is “Delimited” and Tab is selected as the data separator.
When you have opened the file you should immediately choose “Save as” and store the file in Excel format as “Save” will just save the data to the original “.txt” file adhering to the text format. You might now want to use “Conditional Formatting” to make the file more readable and later on add VBA scripts to make some standard check-up on the data.
The XER file relation to the P6 database
The “%T” and “%F” lines refers directly back into the database and it’s schema, i.e. how the data is named and structured. The P6 version number in the header line makes it possible to convert a file exported from a system with a lower version than your P6 system. File exports will always be done in your system’s version and there are no options to change that.
The “%T” shows the table name as it is defined in the P6 database and that is also the name you will see in report generators like PowerBI.
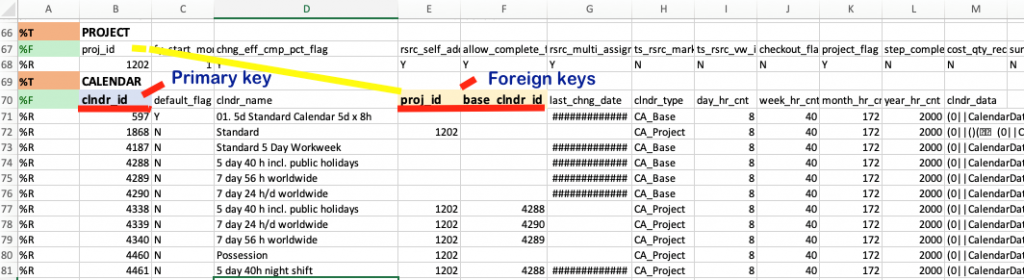
The same goes for the fields listed in the “%F” lines and there are a couple of special fields you should know about. That’s the key fields which have names ending in the string “_id”.
The primary key is a mandatory, unique index for the table; for instance for the CALENDAR table the key field is “clndr_id” (like in cell B70).
Foreign keys are pointers to other tables’ fields and does not need to be unique. For instance, in cell E70 the foreign key “proj_id” points back to the PROJECT table if the calendar is a Project calendar, while it will be blank for Global calendars
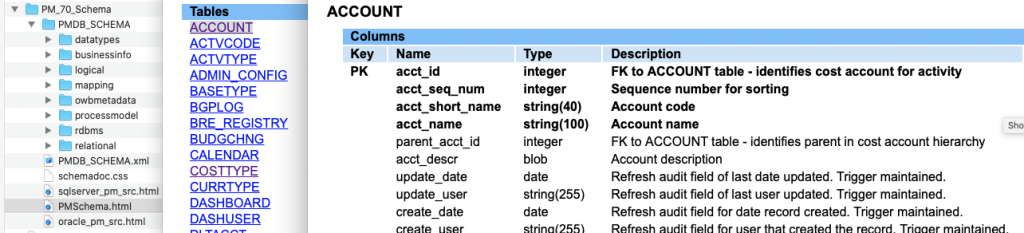
If you wish to dive further into this subject, you should download the EPPM Document Library from Oracle’s “edelivery” site: https://edelivery.oracle.com. To gain access you need an Oracle ID but it’s free to create one. The documentation is linked to a specific P6 version and you just need to download the one relevant for you. Upon extracting the ZIP file you start the web app by clicking on the “index.htm” file in the “root” folder and look under Technical Documentation > Database Schema Documentation.